
Visualizing Critical Path in JIRA Advanced Roadmap or Timeline
If you already have:
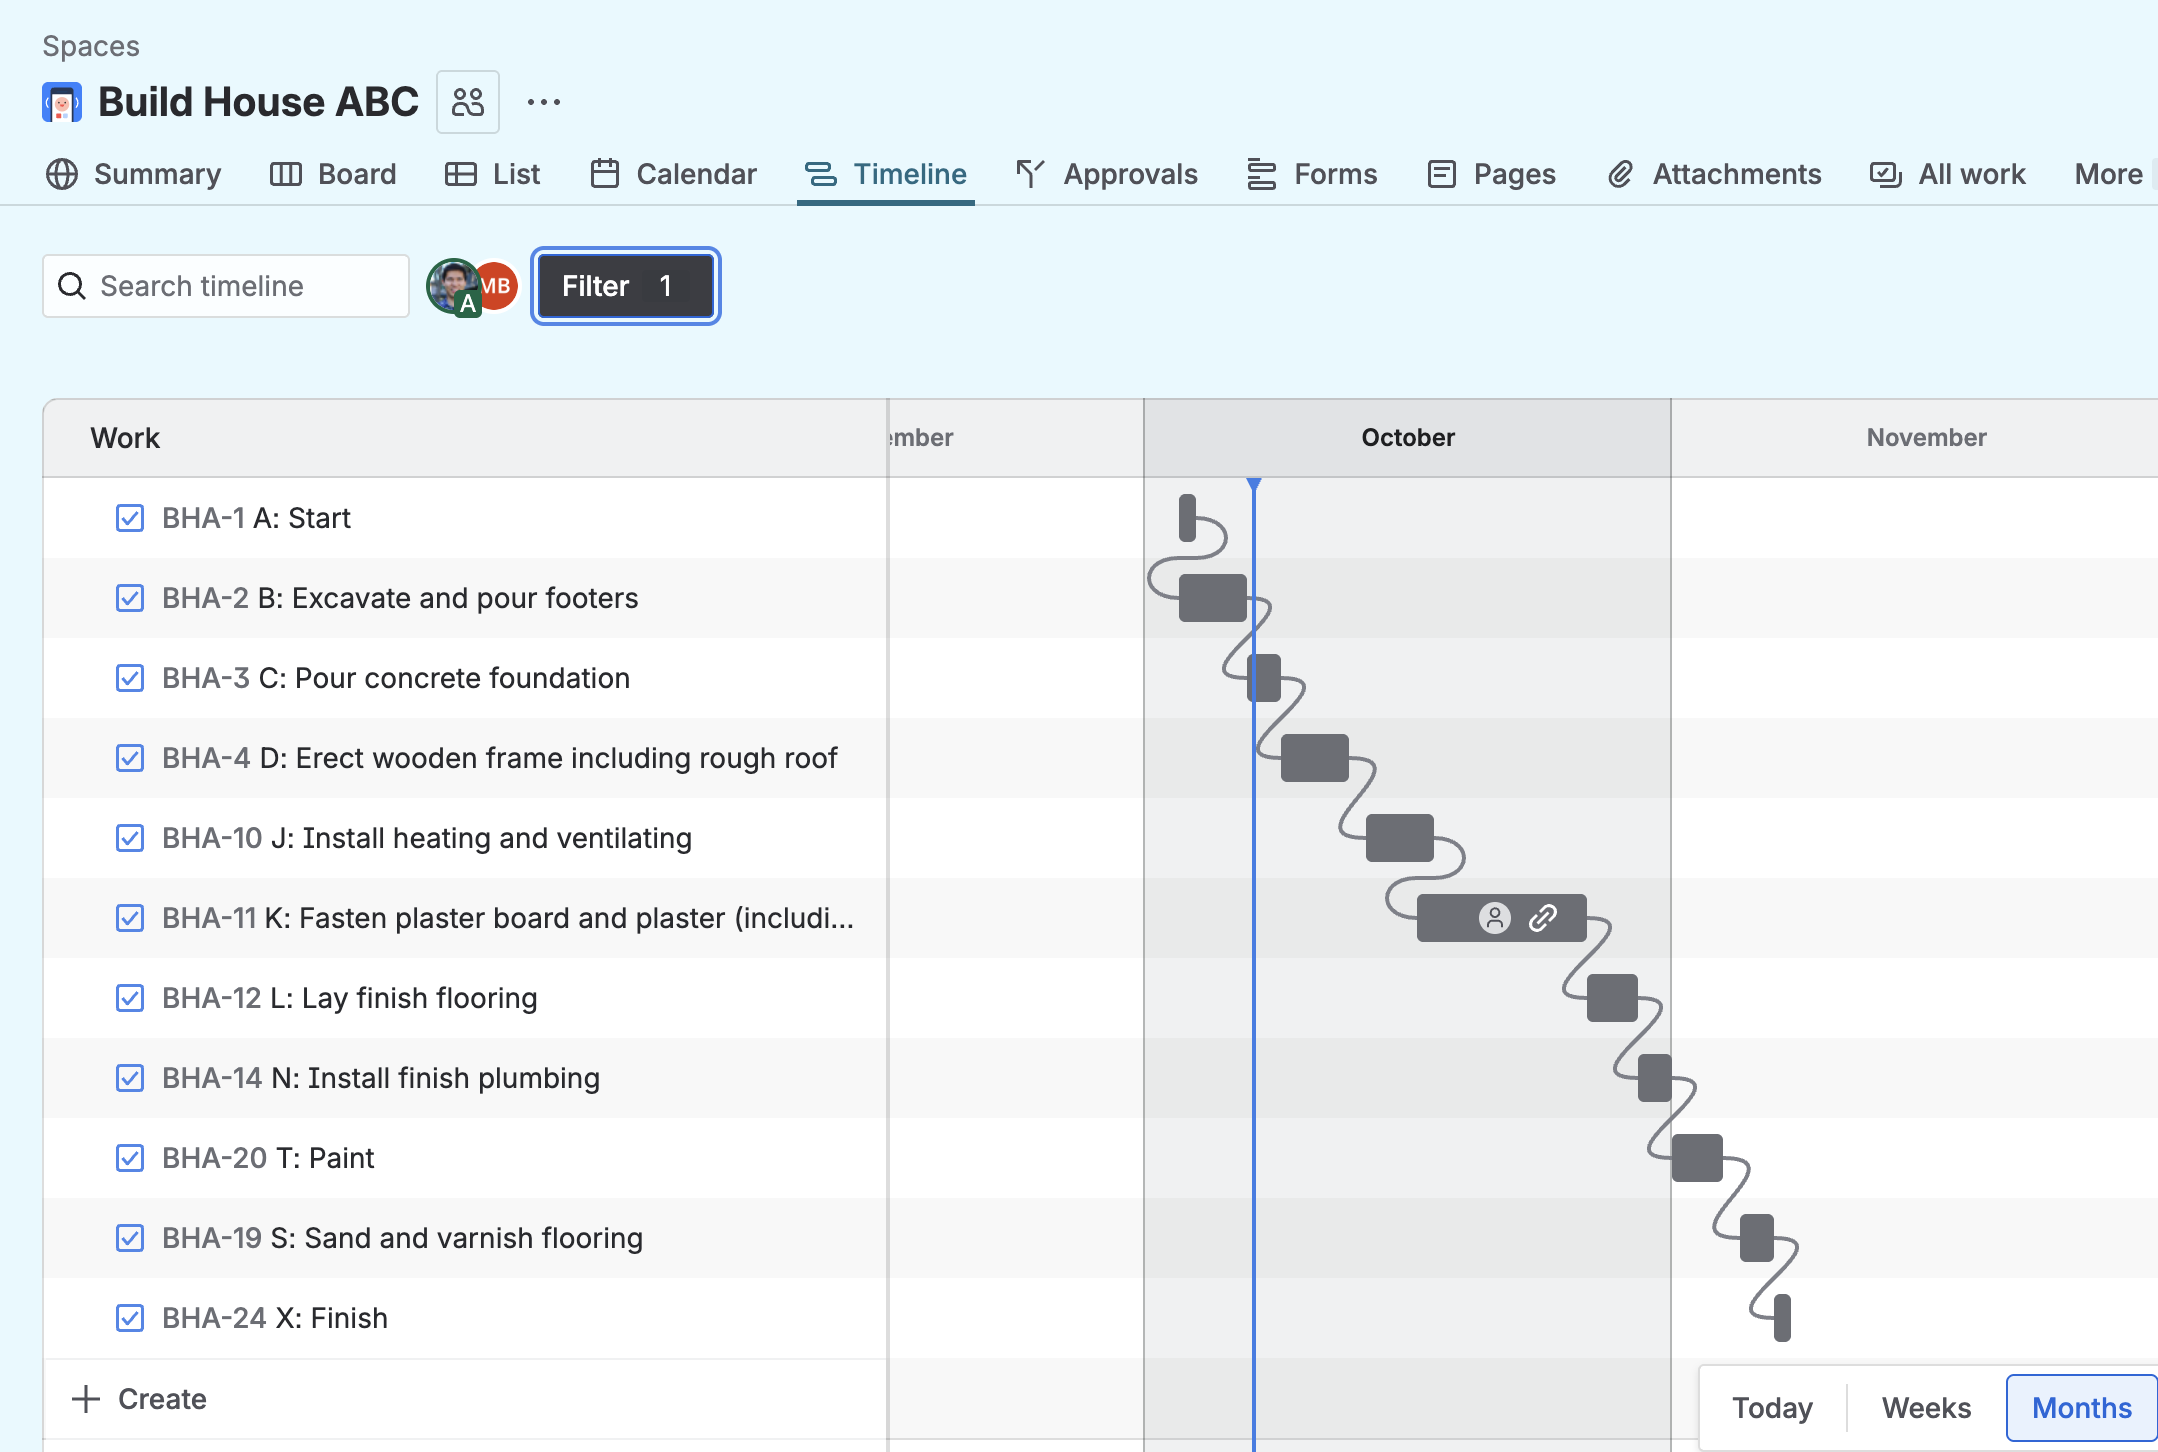
Your project view in the Advanced Roadmap or Timeline in Jira
Durations of the work items are set so they appear as solid rectangles in the plan
Dependencies “Blocks” or “Blocked by” between the work items are added
Instructions
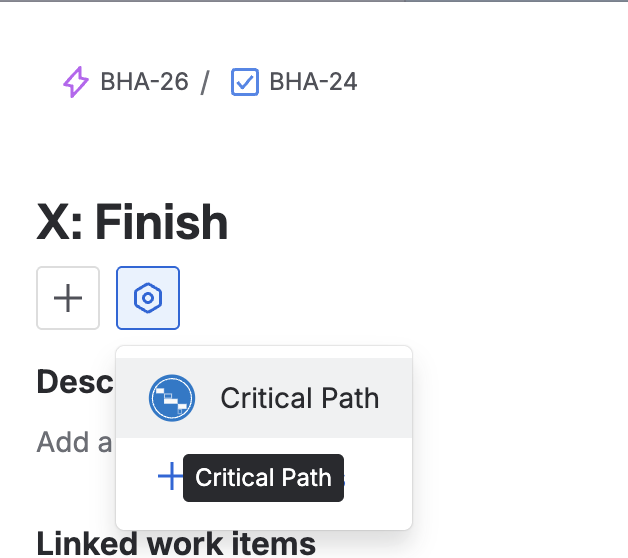
Step 1: Open the final work item and click on “Critical Path” in the app list
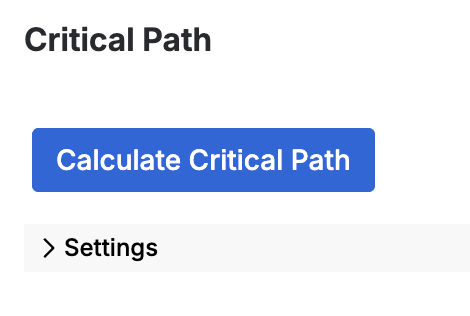
Step 2. Click “Calculate Critical Path”
Step 3. Once the report is ready, click “Add custom label”
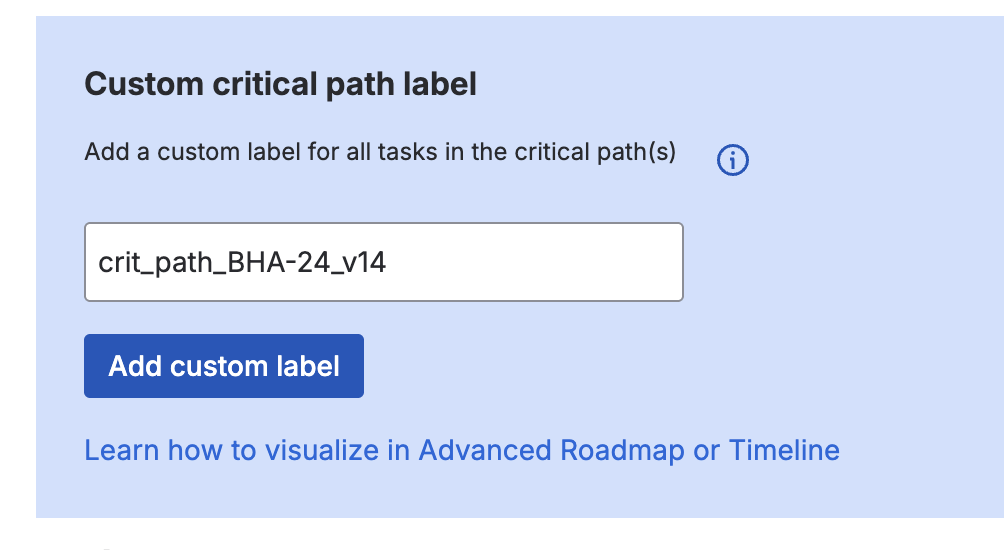
You should see the “Successfully added label…” message

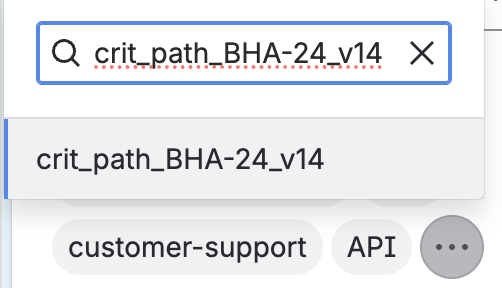
Step 4. Go back to your Timeline view or Advanced Roadmap view and in “Filter” select the label from the previous step
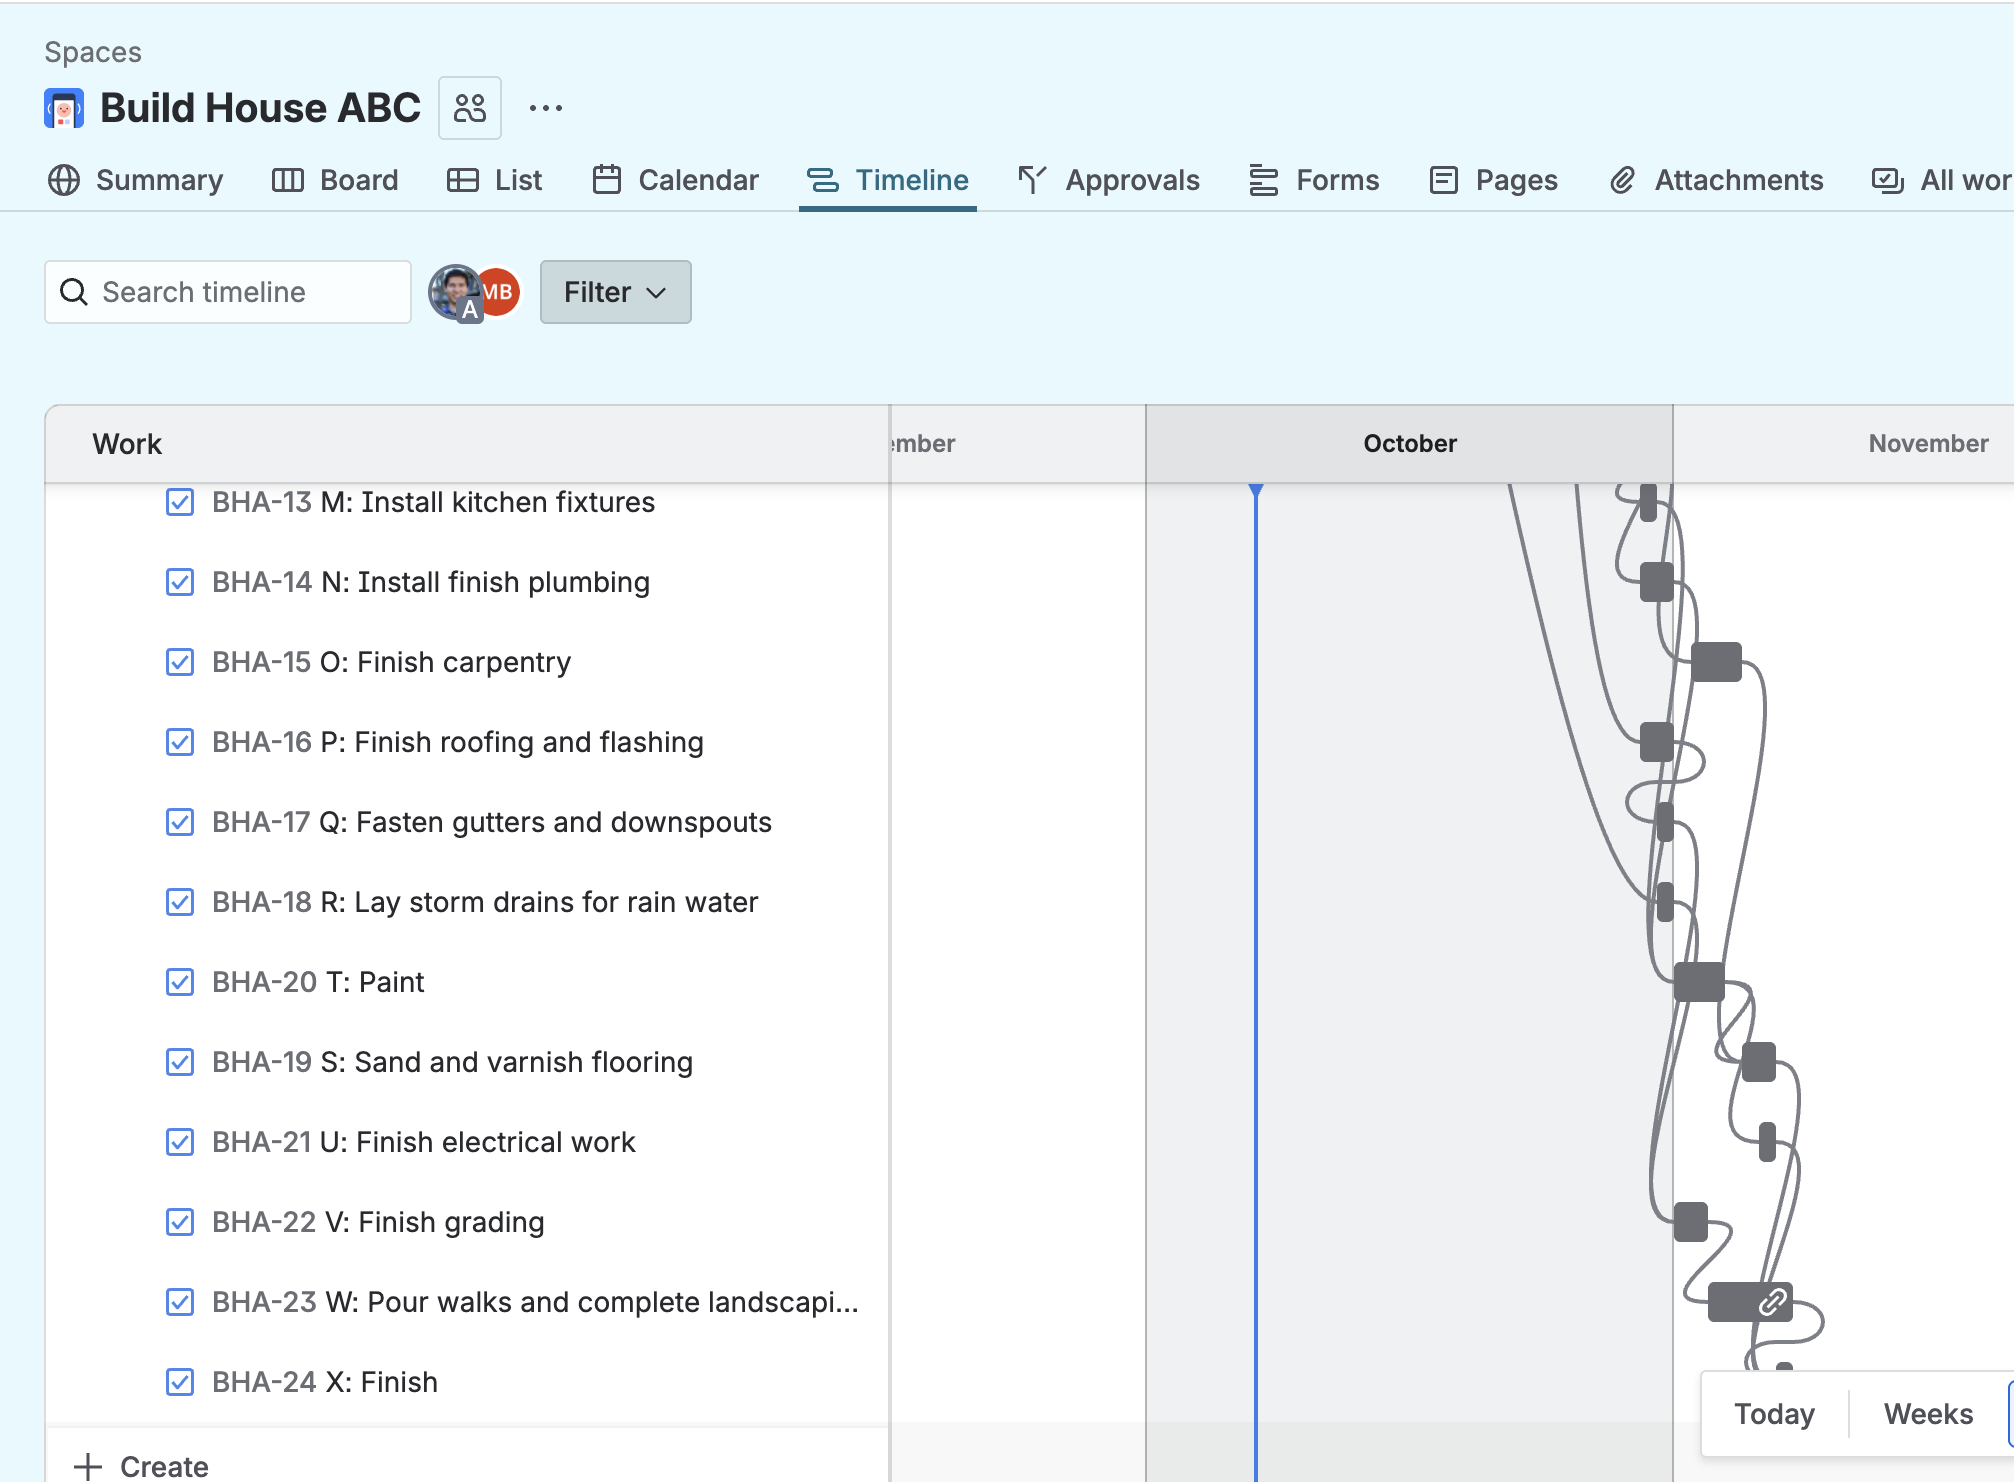
Step 5. Enjoy the view of your Critical path(s)!
To make critical path analysis more useful - play with the settings and resolve action items for missing data